- Home
- Industrial Flanges
Industrial Flanges
Flanges: Specifications | Materials | Types | Dimensions | Weight Chart | Tolerances | FAQ
ASME B16.5 / B16.47 Flanges – Leading Manufacturer & Exporter of Pipe Flanges in Carbon Steel, Stainless Steel, Alloy Steel, Duplex Super Duplex & High Nickel Alloy– Sizes ½” to 24” (B16.5), 26” to 60” (B16.47), Pressure Classes 150# to 2500# – Supplied to Europe, Africa, Asia & Gulf Countries
Best Export Prices: sales@midlandforgefittings.com
Midland Forge and Fittings Pvt. Ltd. is a trusted name in the manufacturing and export of high-performance piping components, with a strong specialization in steel flanges. With years of expertise in forging technology and metallurgical excellence.
we deliver flanges that combine dimensional accuracy, mechanical strength, and corrosion resistance to meet the toughest global standards. Produced in stainless steel, carbon steel, alloy steel, and duplex/super duplex grades, our flanges cover a wide size range from ½” to 60” and pressure classes from 150# to 2500#.
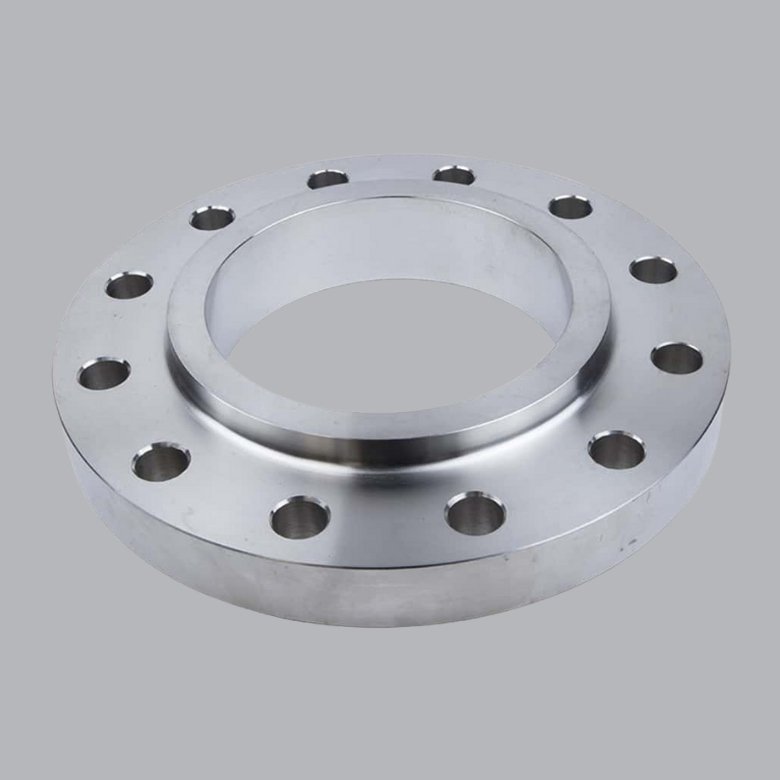
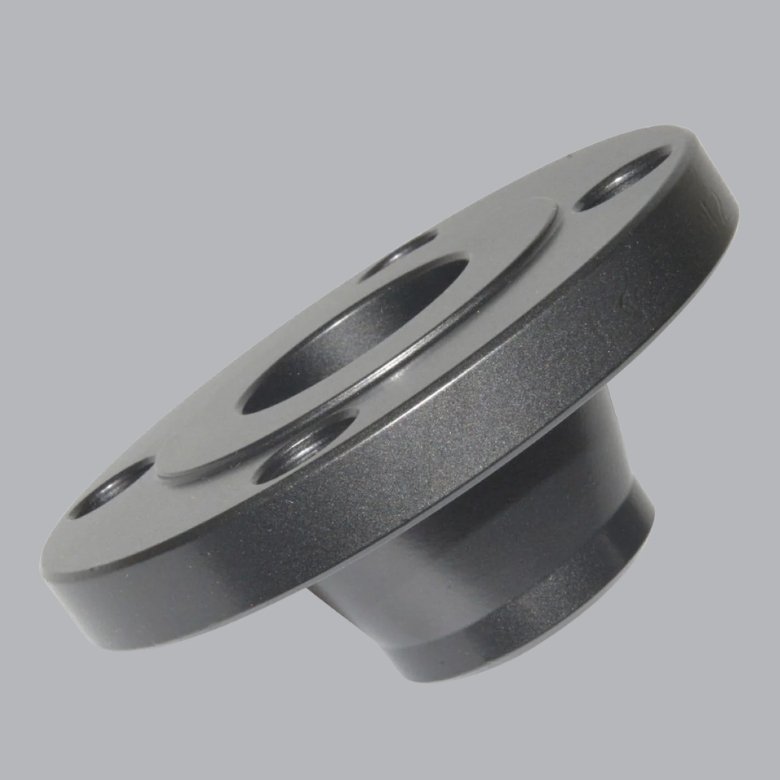
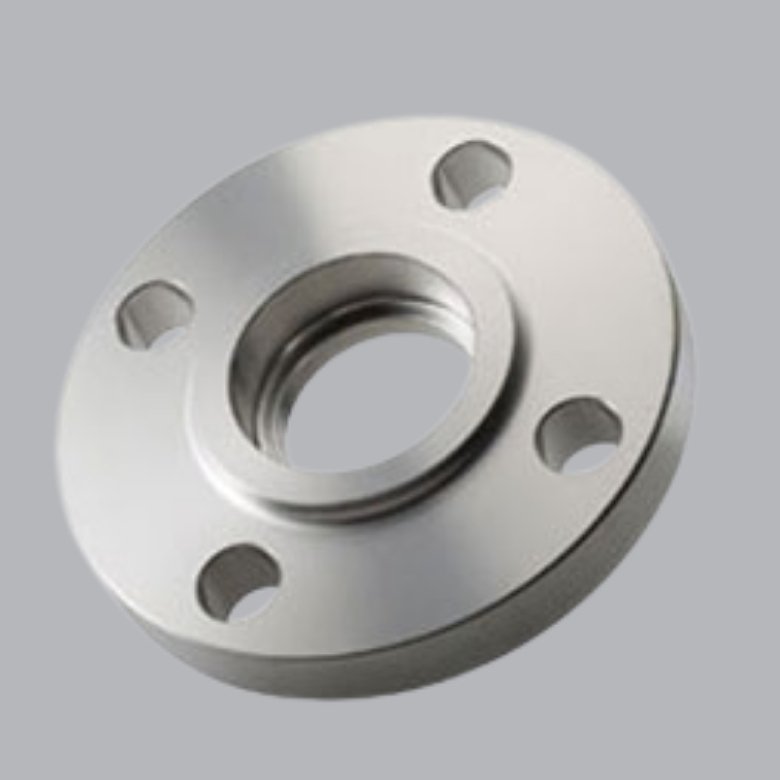
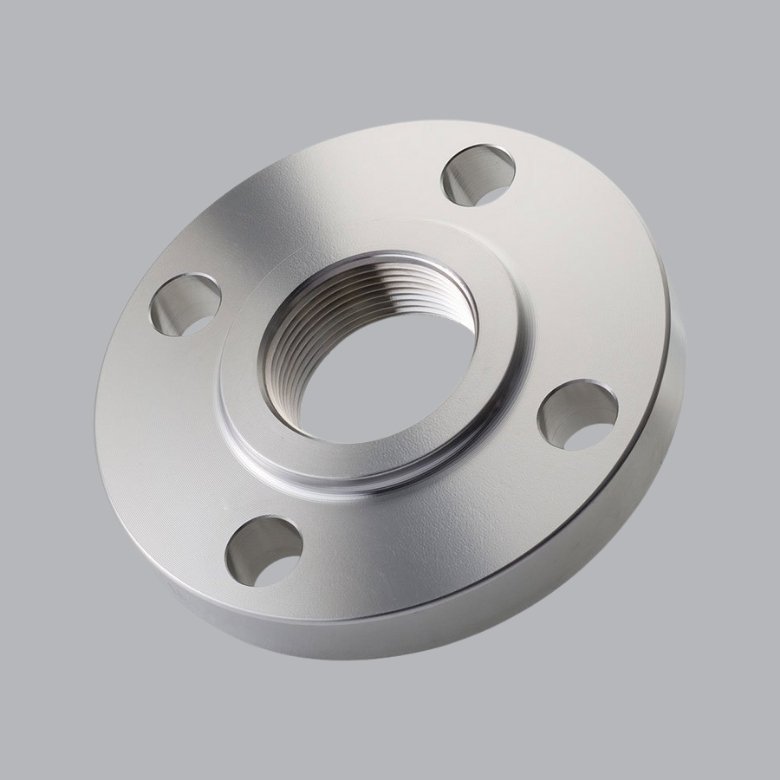
A flange is a precision-engineered connector used in piping systems to join pipes, valves, pumps, and other equipment. Unlike permanent joints, flanges allow easy assembly and disassembly, making inspection and maintenance straightforward. They are typically secured with bolts and gaskets to ensure a strong, leak-proof connection. By providing both structural support and operational flexibility, flanges play a critical role in maintaining safety and efficiency in fluid and gas transport systems.
At Midland Forge, quality is at the core of every flange we manufacture. Each product undergoes stringent testing, from raw material verification to final inspection, ensuring compliance with international codes and client specifications. Our state-of-the-art forging and machining facilities enable us to meet complex project requirements with precision and speed. With a proven track record of timely deliveries and customized solutions, we are committed to being a reliable partner for global EPC contractors, fabricators, and end-users.
Pipe Flange Specifications
Size Range
Pressure Rating - Class
Marking
Face Type / Flange Connection Type
Flange Form
Manufacturing Standards
Materials
Test Certificates
Dimensional Standards
Testing
Flange Coating/Surface Treatment
Production technique
Steel Flanges – Materials, Grades & Standards
| Material Category | Standards / Grades (ASTM / ASME) |
Flange Types (Recommended) |
Pressure Class / Size Range |
Typical Use / Application |
|---|---|---|---|---|
| Stainless Steel | ASTM A182 F304 / F304L / F304H | Weld Neck, Slip-On, Blind, Socket Weld, Threaded, Lap Joint |
Class 150 – 2500, Size ½”–48” |
General purpose, corrosion-resistant piping |
| ASTM A182 F316 / F316L / F316H | Weld Neck, Blind, RTJ, Slip-On | Class 150 – 2500, Size ½”–48” |
Chemical, marine, food & pharma industries | |
| ASTM A182 F321 / F321H | Weld Neck, Blind, Slip-On | Class 150 – 1500, Size ½”–24” |
High temperature, stabilized service | |
| Carbon Steel | ASTM A105 (Forged CS) | Weld Neck, Blind, Slip-On, Threaded, Socket Weld | Class 150 – 2500, Size ½”–48” |
Pressure piping, oil & gas, general industries |
| ASTM A350 LF2 (Low Temp CS) | Weld Neck, Blind | Class 150 – 1500, Size ½”–24” |
Cryogenic & low temperature applications | |
| Alloy Steel | ASTM A182 F11 / F22 (Cr-Mo) | Weld Neck, Blind, Slip-On | Class 150 – 2500, Size ½”–24” |
Power plants, refineries, steam pipelines |
| ASTM A182 F91 | Weld Neck, Blind | Class 150 – 2500, Size ½”–24” |
High-temperature, power generation | |
| Duplex / Super Duplex | ASTM A182 F51 / F53 / F55 / F60 (UNS S31803 / S32205 / S32750 / S32760) |
Weld Neck, Blind, Slip-On, Lap Joint | Class 150 – 2500, Size ½”–24” |
Offshore, seawater, high corrosion service |
| Nickel Alloys | ASTM B564 Inconel 600 / 625 / 718 | Weld Neck, Blind, RTJ | Class 150 – 2500, Size ½”–24” |
Heat exchangers, chemical, aerospace |
| ASTM B564 Monel 400 / K500 | Weld Neck, Slip-On, Blind | Class 150 – 2500, Size ½”–24” |
Marine, seawater handling, pumps | |
| Copper Nickel | ASTM B151 / B467 (Cu-Ni 90/10, 70/30) | Slip-On, Lap Joint, Weld Neck | Class 150 – 600, Size ½”–24” |
Shipbuilding, desalination, seawater systems |
| Titanium | ASTM B381 Gr. 2 / Gr. 5 | Weld Neck, Blind | Class 150 – 600, Size ½”–12” |
Aerospace, seawater, lightweight piping |
| Aluminium | ASTM B247 6061 / 5083 | Slip-On, Lap Joint | Class 150 – 300, Size ½”–12” |
Lightweight, non-corrosive, low-pressure piping |
Explore Industrial Flanges
- Flanges
- Slip On Flange
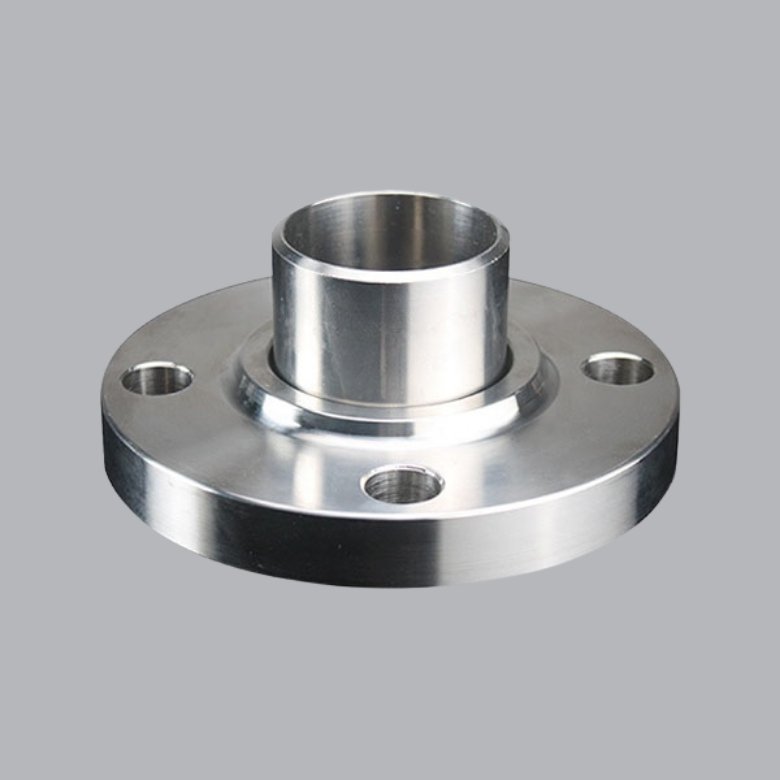
- Weld Neck Flange
- Socket Weld Flange
- Threaded Flange
- Lap Joint Flange
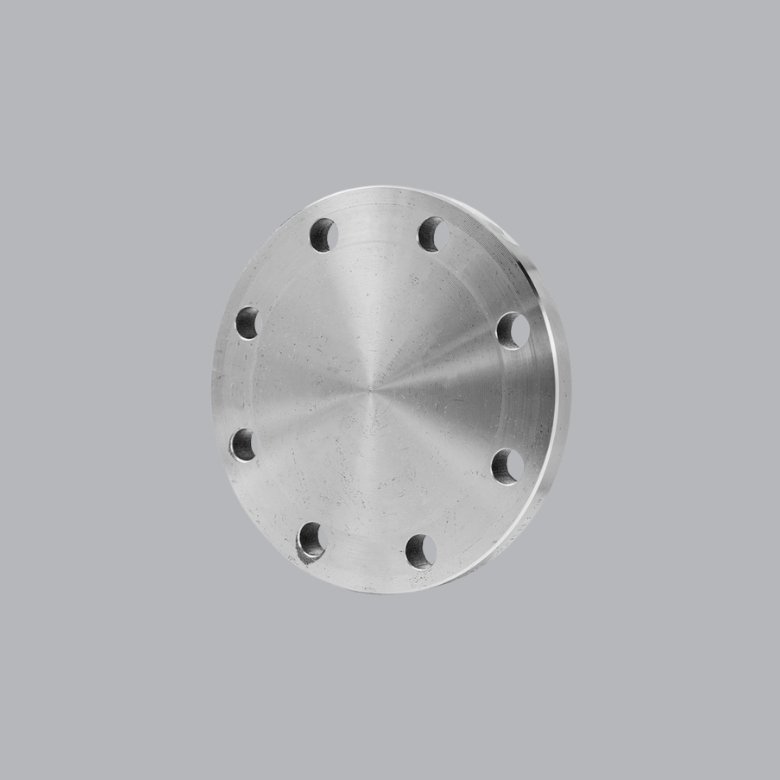
- Blind Flange
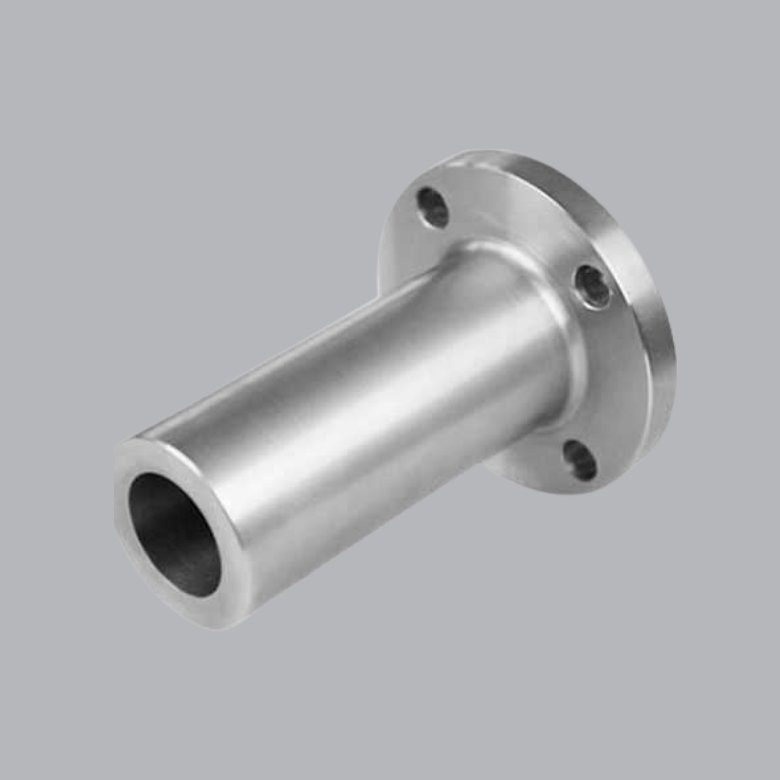
- Long Weld Neck Flange
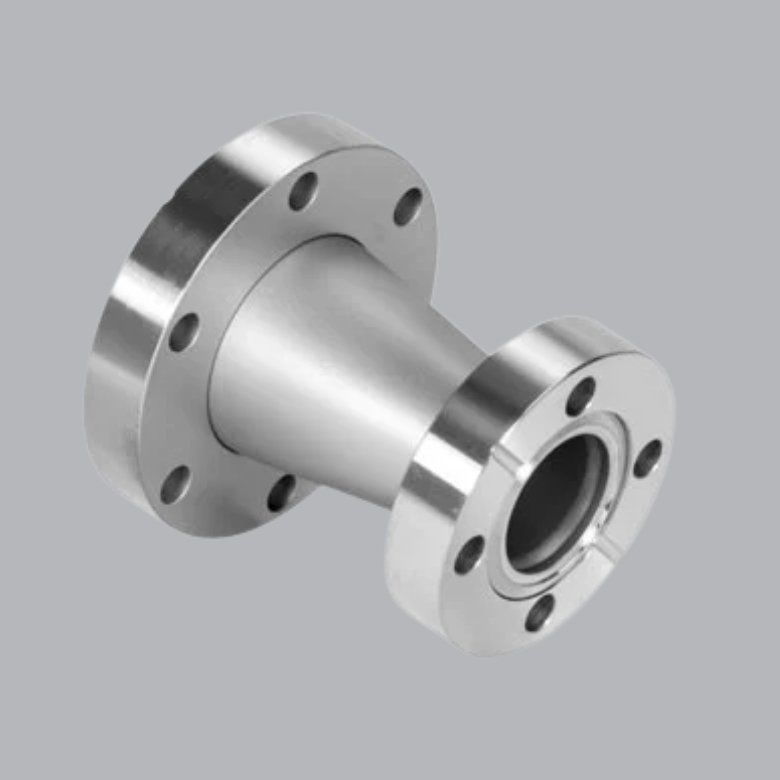
- Reducing Flange
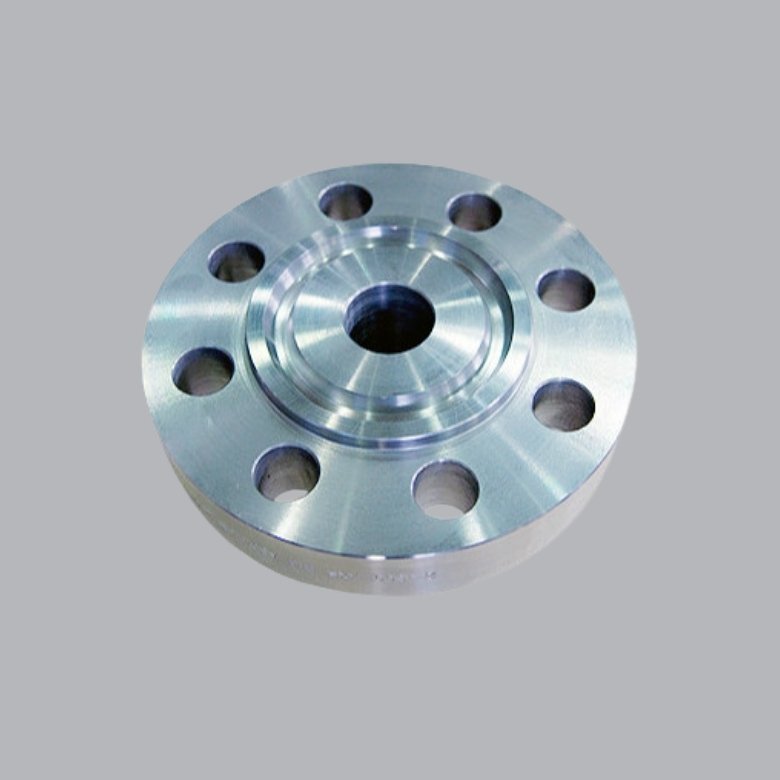
- Ring Type Joint (RTJ) Flange
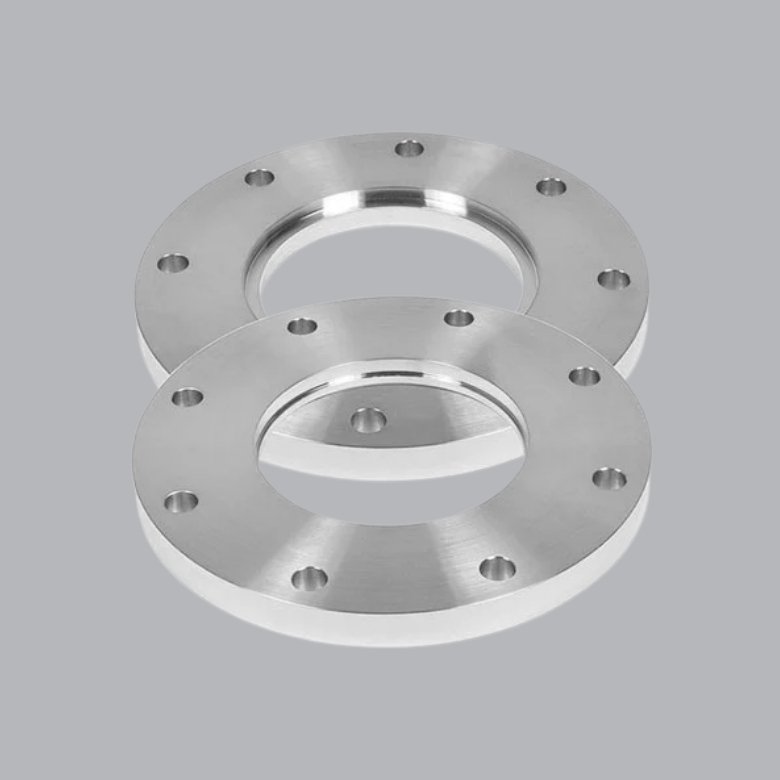
- Plate Flange
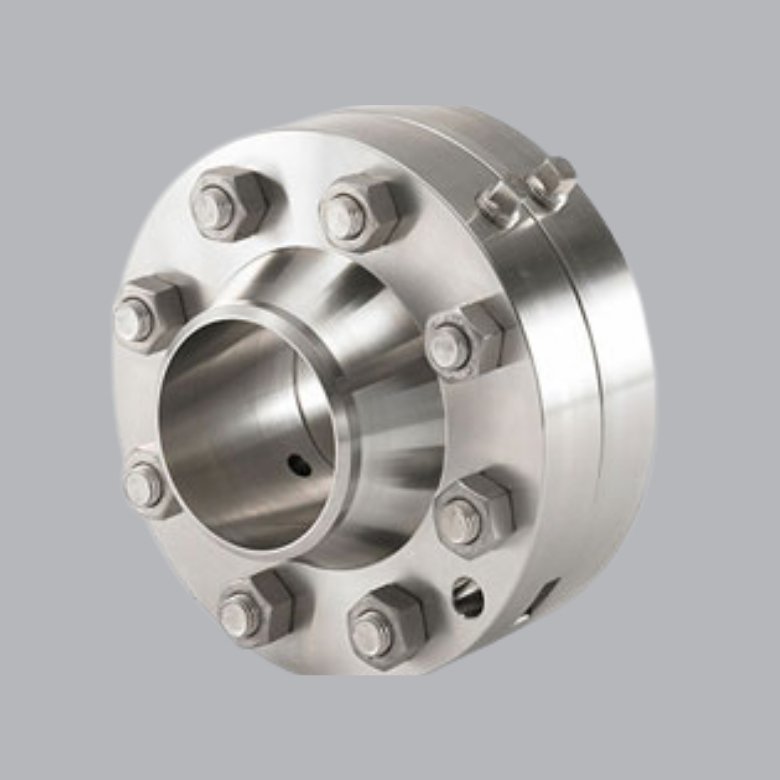
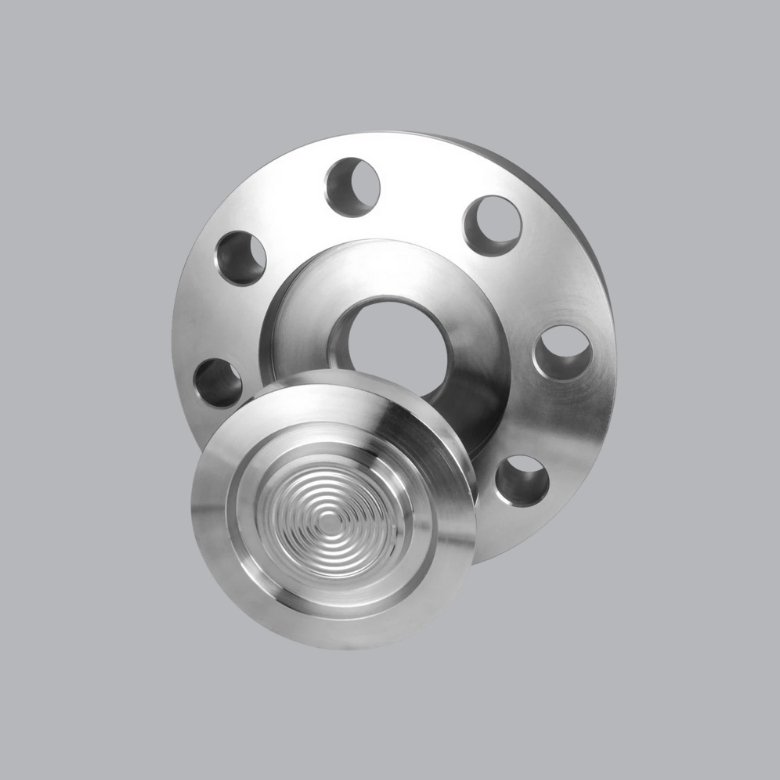
- ASME B16.36 Orifice Flange
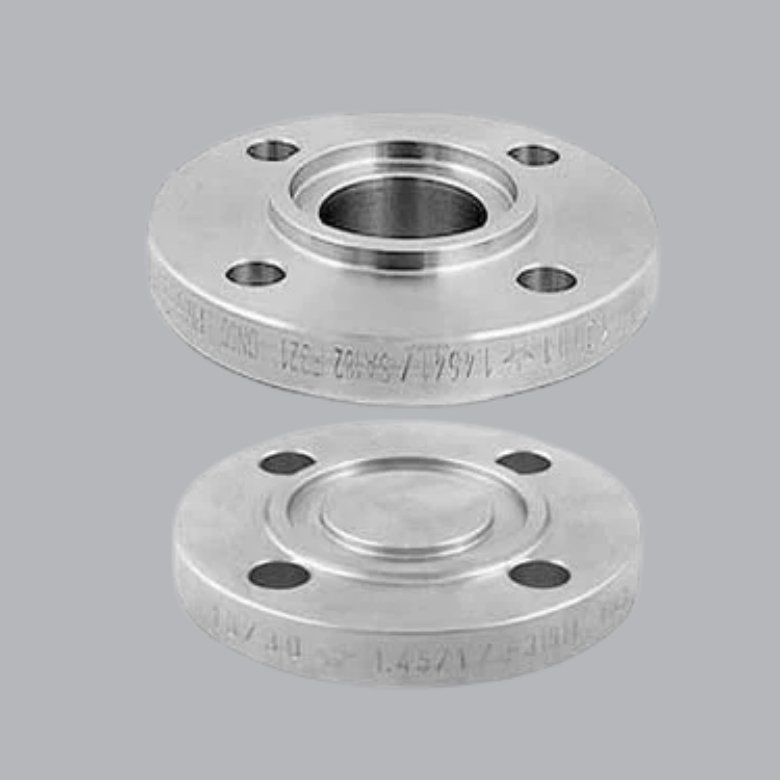
- Tongue and Groove Flange
- Male and Female Flange
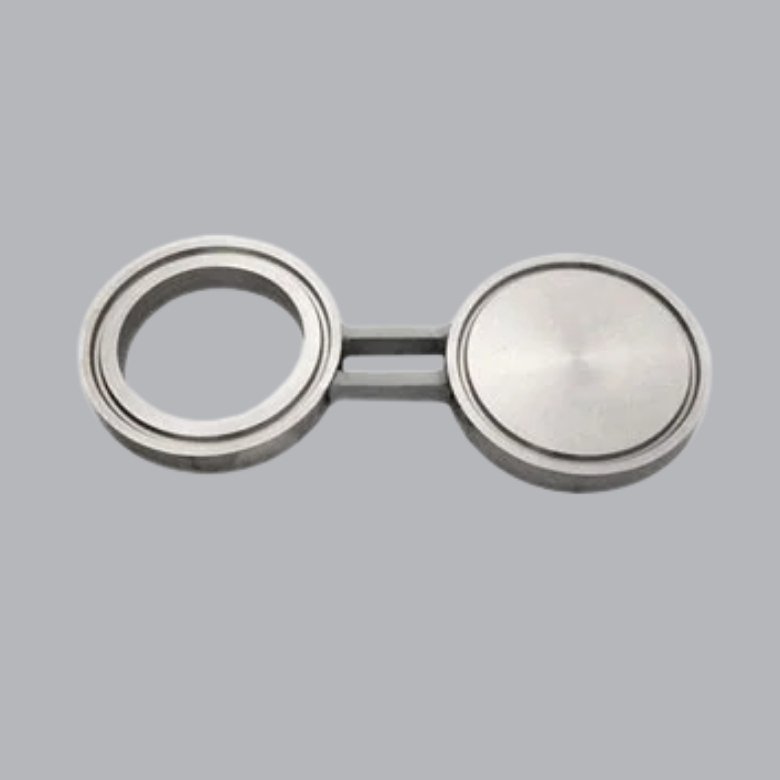
- ASME B16.48 Spectacle Blind / Figure 8 Blank Flange
- Weldoflange
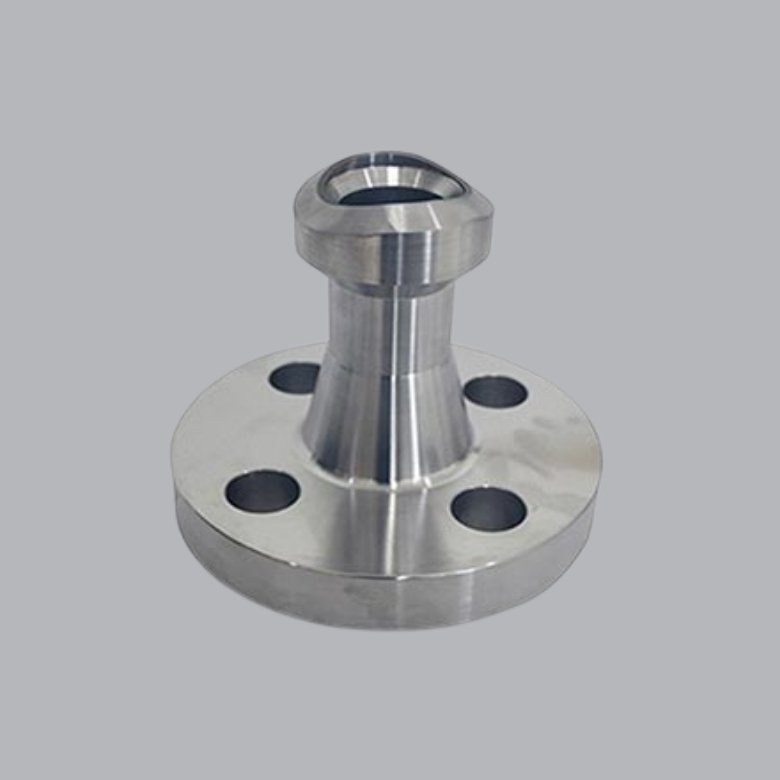
- Nipoflange
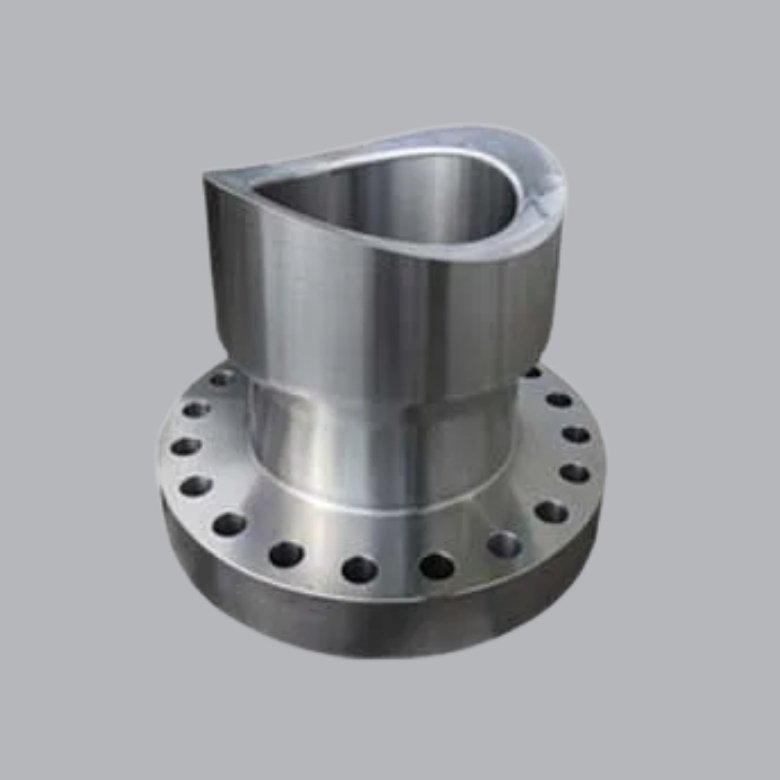
- Sweldolet Flange
Request for an Immediate Offer?
We will reply you in 2 hours during support time!
Conctact Now!Explore All Products
Types of ASME B16.5 Flanges
ANSI/ASME B16.5 Class 150 Flanges – Dimensions & Sizes in mm
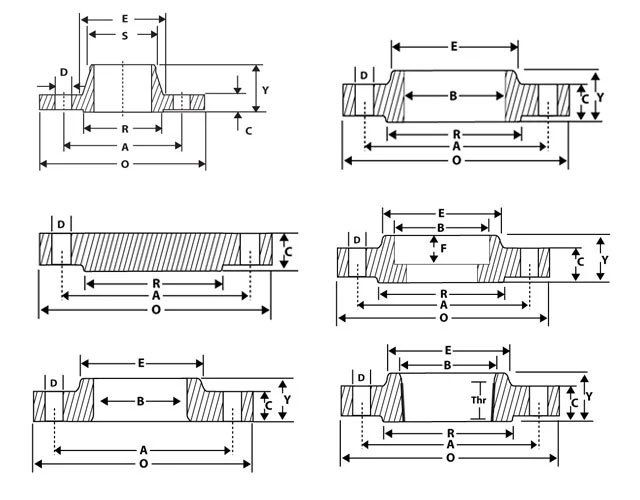
| Nominal Pipe Size |
Flange Dia ‘O’ |
Dia of Bolt Circle ‘A’ |
Dia of Bolt Holes ‘D’ |
No. of Holes |
Thickness of Flange ‘C’ |
Diameter at Weld Bevel |
Dia of Hub ‘E’ |
Length Through Hub | Bore ‘B’ | Dia of R/F R |
Depth of Socket F |
Length of Threading |
||||
|---|---|---|---|---|---|---|---|---|---|---|---|---|---|---|---|---|
| S/O & S/W Y |
W/N Y |
L/J Y |
S/O & S/W B |
L/J B |
||||||||||||
| 1/2” | 15 | 88.9 | 60.3 | 15.9 | 4 | 11.1 | 21.3 | 30.2 | 15.9 | 47.6 | 15.9 | 22.3 | 22.9 | 34.9 | 9.5 | 15.9 |
| 3/4” | 20 | 98.4 | 69.8 | 15.9 | 4 | 12.7 | 26.7 | 38.1 | 15.9 | 52.4 | 15.9 | 27.7 | 28.2 | 42.9 | 11.1 | 15.9 |
| 1” | 25 | 107.9 | 79.4 | 15.9 | 4 | 14.3 | 33.5 | 49.2 | 17.5 | 55.6 | 17.5 | 34.5 | 35.0 | 50.8 | 12.7 | 17.5 |
| 1 ¼” | 32 | 117.5 | 88.9 | 15.9 | 4 | 15.9 | 42.2 | 58.7 | 20.6 | 57.1 | 20.6 | 43.2 | 43.7 | 63.5 | 14.3 | 20.6 |
| 1 ½” | 40 | 127.0 | 98.4 | 15.9 | 4 | 17.5 | 48.3 | 65.1 | 22.2 | 61.9 | 22.2 | 49.5 | 50.0 | 73.0 | 15.9 | 22.2 |
| 2” | 50 | 152.4 | 120.6 | 19.0 | 4 | 19.0 | 60.4 | 77.8 | 25.4 | 63.5 | 25.4 | 62.0 | 62.5 | 92.1 | 17.5 | 25.4 |
| 2 ½” | 65 | 177.8 | 139.7 | 19.0 | 4 | 22.2 | 73.1 | 90.5 | 28.6 | 69.8 | 28.6 | 74.7 | 75.4 | 104.8 | 19.0 | 28.6 |
| 3” | 80 | 190.5 | 152.4 | 19.0 | 4 | 23.8 | 88.9 | 107.9 | 30.2 | 69.8 | 30.2 | 90.7 | 91.4 | 127.0 | 20.6 | 30.2 |
| 3 ½” | 90 | 216.0 | 177.8 | 19.0 | 8 | 23.8 | 101.6 | 122.2 | 31.7 | 71.4 | 31.7 | 103.4 | 104.1 | 140.0 | 20.6 | 31.7 |
| 4” | 100 | 228.6 | 190.5 | 19.0 | 8 | 23.8 | 114.3 | 134.9 | 33.3 | 76.2 | 33.3 | 116.1 | 116.8 | 157.2 | 23.8 | 33.3 |
| 5” | 125 | 254.0 | 215.9 | 22.2 | 8 | 23.8 | 141.2 | 163.5 | 36.5 | 88.9 | 36.5 | 143.8 | 144.5 | 185.7 | 23.8 | 36.5 |
| 6” | 150 | 279.4 | 241.3 | 22.2 | 8 | 25.4 | 168.4 | 192.1 | 39.7 | 88.9 | 39.7 | 170.7 | 171.4 | 215.9 | 27.0 | 39.7 |
| 8” | 200 | 342.9 | 298.4 | 22.2 | 8 | 28.6 | 219.2 | 246.1 | 44.4 | 101.6 | 44.4 | 221.5 | 222.2 | 269.9 | 31.7 | 44.4 |
| 10” | 250 | 406.4 | 361.9 | 25.4 | 12 | 30.2 | 273.0 | 304.8 | 49.2 | 101.6 | 49.2 | 276.3 | 277.4 | 323.8 | 33.3 | 49.2 |
| 12” | 300 | 482.6 | 431.8 | 25.4 | 12 | 31.8 | 323.8 | 365.1 | 55.6 | 114.3 | 55.6 | 327.1 | 328.2 | 381.0 | 39.7 | 55.6 |
| 14” | 350 | 533.4 | 476.2 | 28.6 | 12 | 34.9 | 355.6 | 400.0 | 57.1 | 127.0 | 79.4 | 359.1 | 360.2 | 412.7 | 41.3 | 57.1 |
| 16” | 400 | 596.9 | 539.7 | 28.6 | 16 | 36.5 | 406.4 | 457.2 | 63.5 | 127.0 | 87.3 | 410.5 | 411.2 | 469.9 | 44.4 | 63.5 |
| 18” | 450 | 635.0 | 577.8 | 31.7 | 16 | 39.7 | 457.2 | 504.8 | 68.3 | 139.7 | 96.8 | 461.8 | 462.3 | 533.4 | 49.2 | 68.3 |
| 20” | 500 | 698.5 | 635.0 | 31.7 | 20 | 42.9 | 508.0 | 558.8 | 73.0 | 144.5 | 103.2 | 513.1 | 514.3 | 584.2 | 54.0 | 73.0 |
| 24” | 600 | 812.8 | 749.3 | 34.9 | 20 | 47.6 | 609.6 | 663.6 | 82.5 | 152.4 | 111.1 | 615.9 | 615.9 | 692.1 | 63.5 | 82.5 |
ANSI/ASME B16.5 Class 300 Flanges – Dimensions & Sizes in mm
| Nominal Pipe Size |
Flange Dia ‘O’ |
Dia of Bolt Circle ‘A’ |
Dia of Bolt Holes ‘D’ |
No. of Holes |
Thickness of Flange ‘C’ |
Diameter at Weld Bevel |
Dia of Hub ‘E’ |
Length Through Hub | Bore ‘B’ | Dia of R/F R |
Depth of Socket F |
Length of Threading |
||||
|---|---|---|---|---|---|---|---|---|---|---|---|---|---|---|---|---|
| S/O & S/W Y |
W/N Y |
L/J Y |
S/O & S/W B |
L/J B |
||||||||||||
| 1/2” | 15 | 95.2 | 66.7 | 15.9 | 4 | 14.3 | 21.3 | 38.1 | 22.2 | 52.4 | 22.2 | 22.3 | 22.9 | 34.9 | 9.5 | 15.9 |
| 3/4” | 20 | 117.5 | 82.5 | 19.0 | 4 | 15.9 | 26.7 | 47.6 | 25.4 | 57.1 | 25.4 | 27.7 | 28.2 | 42.9 | 11.1 | 15.9 |
| 1” | 25 | 123.8 | 88.9 | 19.0 | 4 | 17.5 | 33.5 | 54.0 | 27.0 | 61.9 | 27.0 | 34.5 | 35.0 | 50.8 | 12.7 | 17.5 |
| 1 ¼” | 32 | 133.3 | 98.4 | 19.0 | 4 | 19.0 | 42.2 | 63.5 | 27.0 | 65.1 | 27.0 | 43.2 | 43.7 | 63.5 | 14.3 | 20.6 |
| 1 ½” | 40 | 155.6 | 114.3 | 22.2 | 4 | 20.6 | 48.3 | 69.8 | 30.2 | 68.3 | 30.2 | 49.5 | 50.0 | 73.0 | 15.9 | 22.2 |
| 2” | 50 | 165.1 | 127.0 | 19.0 | 8 | 22.2 | 60.4 | 84.1 | 33.3 | 69.8 | 33.3 | 62.0 | 62.5 | 92.1 | 17.5 | 25.4 |
| 2 ½” | 65 | 190.5 | 149.2 | 22.2 | 8 | 25.4 | 73.1 | 100.0 | 38.1 | 76.2 | 38.1 | 74.7 | 75.4 | 104.8 | 19.0 | 28.6 |
| 3” | 80 | 209.5 | 168.3 | 22.2 | 8 | 28.6 | 88.9 | 117.5 | 42.9 | 79.4 | 42.9 | 90.7 | 91.4 | 127.0 | 20.6 | 30.2 |
| 3 ½” | 90 | 228.5 | 184.2 | 22.2 | 8 | 30.2 | 101.6 | 133.4 | 44.5 | 81.0 | 44.5 | 103.4 | 104.1 | 140.0 | 20.6 | 31.7 |
| 4” | 100 | 254.0 | 200.0 | 22.2 | 8 | 31.8 | 114.3 | 146.0 | 47.6 | 85.7 | 47.6 | 116.1 | 116.8 | 157.2 | 23.8 | 33.3 |
| 5” | 125 | 279.4 | 234.9 | 22.2 | 8 | 34.9 | 141.2 | 177.8 | 50.8 | 98.4 | 50.8 | 143.8 | 144.5 | 185.7 | – | 36.5 |
| 6” | 150 | 317.5 | 269.9 | 22.2 | 12 | 36.5 | 168.4 | 206.4 | 52.4 | 98.4 | 52.4 | 170.7 | 171.4 | 215.9 | – | 39.7 |
| 8” | 200 | 381.0 | 330.2 | 25.4 | 12 | 41.3 | 219.2 | 260.3 | 61.9 | 111.1 | 61.9 | 221.5 | 222.2 | 269.9 | – | 44.4 |
| 10” | 250 | 444.5 | 387.3 | 28.6 | 16 | 47.6 | 273.0 | 320.7 | 66.7 | 117.5 | 95.2 | 276.3 | 277.4 | 323.8 | – | 49.2 |
| 12” | 300 | 520.7 | 450.8 | 31.7 | 16 | 50.8 | 323.8 | 374.6 | 73.0 | 130.2 | 101.6 | 327.1 | 328.2 | 381.0 | – | 55.6 |
| 14” | 350 | 584.2 | 514.3 | 31.7 | 20 | 54.0 | 355.6 | 425.4 | 76.2 | 142.9 | 111.1 | 359.1 | 360.2 | 412.7 | – | 57.1 |
| 16” | 400 | 647.7 | 571.5 | 34.9 | 20 | 57.2 | 406.4 | 482.6 | 82.5 | 146.0 | 120.6 | 410.5 | 411.2 | 469.9 | – | 63.5 |
| 18” | 450 | 711.2 | 628.5 | 34.9 | 24 | 60.3 | 457.2 | 533.4 | 88.9 | 158.7 | 130.2 | 461.8 | 462.3 | 533.4 | – | 68.3 |
| 20” | 500 | 774.7 | 685.8 | 34.9 | 24 | 63.5 | 508.0 | 587.4 | 95.2 | 161.9 | 139.7 | 513.1 | 514.3 | 584.2 | – | 73.0 |
| 24” | 600 | 914.4 | 812.8 | 41.3 | 24 | 69.8 | 609.6 | 701.7 | 106.4 | 168.3 | 152.4 | 615.9 | 615.9 | 692.1 | – | 82.5 |
ANSI/ASME B16.5 Class 600 Flanges – Dimensions & Sizes in mm
| Nominal Pipe Size |
Flange Dia ‘O’ |
Dia of Bolt Circle ‘A’ |
Dia of Bolt Holes ‘D’ |
No. of Holes |
Thickness of Flange ‘C’ |
Diameter at Weld Bevel |
Dia of Hub ‘E’ |
Length Through Hub | Bore ‘B’ | Dia of R/F R |
Depth of Socket F |
Length of Threading |
||||
|---|---|---|---|---|---|---|---|---|---|---|---|---|---|---|---|---|
| S/O & S/W Y |
W/N Y |
L/J Y |
S/O & S/W B |
L/J B |
||||||||||||
| 1/2” | 15 | 95.2 | 66.7 | 15.9 | 4 | 14.3 | 21.3 | 38.1 | 22.2 | 52.4 | 22.2 | 22.3 | 22.9 | 34.9 | 9.5 | 15.9 |
| 3/4” | 20 | 117.5 | 82.5 | 19.0 | 4 | 15.9 | 26.7 | 47.6 | 25.4 | 57.1 | 25.4 | 27.7 | 28.2 | 42.9 | 11.1 | 15.9 |
| 1” | 25 | 123.8 | 88.9 | 19.0 | 4 | 17.5 | 33.5 | 54.0 | 27.0 | 61.9 | 27.0 | 34.5 | 35.0 | 50.8 | 12.7 | 17.5 |
| 1 ¼” | 32 | 133.3 | 98.4 | 19.0 | 4 | 20.6 | 42.2 | 63.5 | 28.6 | 66.7 | 28.6 | 43.2 | 43.7 | 63.5 | 14.3 | 20.6 |
| 1 ½” | 40 | 155.6 | 114.3 | 22.2 | 4 | 22.2 | 48.3 | 69.8 | 31.7 | 69.8 | 31.7 | 49.5 | 50.0 | 73.0 | 15.9 | 22.2 |
| 2” | 50 | 165.1 | 127.0 | 19.0 | 8 | 25.4 | 60.4 | 84.1 | 36.5 | 73.0 | 36.5 | 62.0 | 62.5 | 92.1 | 17.5 | 25.4 |
| 2 ½” | 65 | 190.5 | 149.2 | 22.2 | 8 | 28.6 | 73.1 | 100.0 | 41.3 | 79.4 | 41.3 | 74.7 | 75.4 | 104.8 | 19.0 | 28.6 |
| 3” | 80 | 209.5 | 168.3 | 22.2 | 8 | 31.8 | 88.9 | 117.5 | 46.0 | 82.5 | 46.0 | 90.7 | 91.4 | 127.0 | – | 30.2 |
| 3 ½” | 90 | 228.5 | 184.2 | 22.2 | 8 | 34.9 | 101.6 | 133.4 | 49.3 | 85.7 | 49.3 | 103.4 | 104.1 | 140.0 | – | 31.7 |
| 4” | 100 | 273.0 | 215.9 | 25.4 | 8 | 38.1 | 114.3 | 152.4 | 54.0 | 101.6 | 54.0 | 116.1 | 116.8 | 157.2 | – | 33.3 |
| 5” | 125 | 330.2 | 266.7 | 28.6 | 8 | 44.4 | 141.2 | 188.9 | 60.3 | 114.3 | 60.3 | 143.8 | 144.5 | 185.7 | – | 36.5 |
| 6” | 150 | 355.6 | 292.1 | 28.6 | 12 | 47.6 | 168.4 | 222.2 | 66.7 | 117.5 | 66.7 | 170.7 | 171.4 | 215.9 | – | 39.7 |
| 8” | 200 | 419.1 | 349.2 | 31.7 | 12 | 55.6 | 219.2 | 273.0 | 76.2 | 133.3 | 76.2 | 221.5 | 222.2 | 269.9 | – | 44.4 |
| 10” | 250 | 508.0 | 431.8 | 34.9 | 16 | 63.5 | 273.0 | 342.9 | 85.7 | 152.4 | 111.2 | 276.3 | 277.4 | 323.8 | – | 49.2 |
| 12” | 300 | 558.8 | 488.9 | 34.9 | 20 | 66.7 | 323.8 | 400.0 | 92.1 | 155.6 | 117.3 | 327.1 | 328.2 | 381.0 | – | 55.6 |
| 14” | 350 | 603.2 | 527.0 | 38.1 | 20 | 69.9 | 355.6 | 431.8 | 93.7 | 165.1 | 127.0 | 359.1 | 360.2 | 412.7 | – | 57.1 |
| 16” | 400 | 685.8 | 603.2 | 41.3 | 20 | 76.2 | 406.4 | 495.3 | 106.4 | 177.8 | 139.7 | 410.5 | 411.2 | 469.9 | – | 63.5 |
| 18” | 450 | 742.9 | 654.0 | 44.4 | 24 | 82.6 | 457.2 | 546.1 | 117.5 | 184.1 | 152.4 | 461.8 | 462.3 | 533.4 | – | 68.3 |
| 20” | 500 | 812.8 | 723.9 | 44.4 | 24 | 88.9 | 508.0 | 609.6 | 127.0 | 190.5 | 165.1 | 513.1 | 514.3 | 584.2 | – | 73.0 |
| 24” | 600 | 939.8 | 838.2 | 50.8 | 24 | 101.6 | 609.6 | 717.5 | 139.7 | 203.2 | 184.1 | 615.9 | 615.9 | 692.1 | – | 82.5 |
ANSI/ASME B16.5 Class 900 Flanges – Dimensions & Sizes in mm
| Nominal Pipe Size |
Flange Dia ‘O’ |
Dia of Bolt Circle ‘A’ |
Dia of Bolt Holes ‘D’ |
No. of Holes |
Thickness of Flange ‘C’ |
Diameter at | Dia of Hub Weld Bevel ‘E’ |
Length Through Hub | Bore ‘B’ | Dia of R/F R |
Depth of Socket F |
Length of Threading |
||||
|---|---|---|---|---|---|---|---|---|---|---|---|---|---|---|---|---|
| S/O & S/W Y |
W/N Y |
L/J Y |
S/O & S/W B |
L/J B |
||||||||||||
| 1/2” | 15 | 95.2 | 66.7 | 15.9 | 4 | 14.3 | 21.3 | 38.1 | 22.2 | 52.4 | 22.2 | 22.3 | 22.9 | 34.9 | 9.5 | 15.9 |
| 3/4” | 20 | 117.5 | 82.5 | 19.0 | 4 | 15.9 | 26.7 | 47.6 | 25.4 | 57.1 | 25.4 | 27.7 | 28.2 | 42.9 | 11.1 | 15.9 |
| 1” | 25 | 123.8 | 88.9 | 19.0 | 4 | 17.5 | 33.5 | 54.0 | 27.0 | 61.9 | 27.0 | 34.5 | 35.0 | 50.8 | 12.7 | 17.5 |
| 1 ¼” | 32 | 133.3 | 98.4 | 19.0 | 4 | 20.6 | 42.2 | 63.5 | 28.6 | 66.7 | 28.6 | 43.2 | 43.7 | 63.5 | 14.3 | 20.6 |
| 1 ½” | 40 | 155.6 | 114.3 | 22.2 | 4 | 22.2 | 48.3 | 69.8 | 31.7 | 69.8 | 31.7 | 49.5 | 50.0 | 73.0 | 15.9 | 22.2 |
| 2” | 50 | 165.1 | 127.0 | 19.0 | 8 | 25.4 | 60.4 | 84.1 | 36.5 | 73.0 | 36.5 | 62.0 | 62.5 | 92.1 | 17.5 | 25.4 |
| 2 ½” | 65 | 190.5 | 149.2 | 22.2 | 8 | 28.6 | 73.1 | 100.0 | 41.3 | 79.4 | 41.3 | 74.7 | 75.4 | 104.8 | 19.0 | 28.6 |
| 3” | 80 | 209.5 | 168.3 | 22.2 | 8 | 31.8 | 88.9 | 117.5 | 46.0 | 82.5 | 46.0 | 90.7 | 91.4 | 127.0 | – | 30.2 |
| 3 ½” | 90 | 228.5 | 184.2 | 22.2 | 8 | 34.9 | 101.6 | 133.4 | 49.3 | 85.7 | 49.3 | 103.4 | 104.1 | 140.0 | – | 31.7 |
| 4” | 100 | 273.0 | 215.9 | 25.4 | 8 | 38.1 | 114.3 | 152.4 | 54.0 | 101.6 | 54.0 | 116.1 | 116.8 | 157.2 | – | 33.3 |
| 5” | 125 | 330.2 | 266.7 | 28.6 | 8 | 44.4 | 141.2 | 188.9 | 60.3 | 114.3 | 60.3 | 143.8 | 144.5 | 185.7 | – | 36.5 |
| 6” | 150 | 355.6 | 292.1 | 28.6 | 12 | 47.6 | 168.4 | 222.2 | 66.7 | 117.5 | 66.7 | 170.7 | 171.4 | 215.9 | – | 39.7 |
| 8” | 200 | 419.1 | 349.2 | 31.7 | 12 | 55.6 | 219.2 | 273.0 | 76.2 | 133.3 | 76.2 | 221.5 | 222.2 | 269.9 | – | 44.4 |
| 10” | 250 | 508.0 | 431.8 | 34.9 | 16 | 63.5 | 273.0 | 342.9 | 85.7 | 152.4 | 111.2 | 276.3 | 277.4 | 323.8 | – | 49.2 |
| 12” | 300 | 558.8 | 488.9 | 34.9 | 20 | 66.7 | 323.8 | 400.0 | 92.1 | 155.6 | 117.3 | 327.1 | 328.2 | 381.0 | – | 55.6 |
| 14” | 350 | 603.2 | 527.0 | 38.1 | 20 | 69.9 | 355.6 | 431.8 | 93.7 | 165.1 | 127.0 | 359.1 | 360.2 | 412.7 | – | 57.1 |
| 16” | 400 | 685.8 | 603.2 | 41.3 | 20 | 76.2 | 406.4 | 495.3 | 106.4 | 177.8 | 139.7 | 410.5 | 411.2 | 469.9 | – | 63.5 |
| 18” | 450 | 742.9 | 654.0 | 44.4 | 24 | 82.6 | 457.2 | 546.1 | 117.5 | 184.1 | 152.4 | 461.8 | 462.3 | 533.4 | – | 68.3 |
| 20” | 500 | 812.8 | 723.9 | 44.4 | 24 | 88.9 | 508.0 | 609.6 | 127.0 | 190.5 | 165.1 | 513.1 | 514.3 | 584.2 | – | 73.0 |
| 24” | 600 | 939.8 | 838.2 | 50.8 | 24 | 101.6 | 609.6 | 717.5 | 139.7 | 203.2 | 184.1 | 615.9 | 615.9 | 692.1 | – | 82.5 |
ANSI/ASME B16.5 Class 1500 Flanges – Dimensions & Sizes in mm
| Nominal Pipe Size |
Flange Dia ‘O’ |
Dia of Bolt Circle ‘A’ |
Dia of Bolt Holes ‘D’ |
No. of Holes |
Thickness of Flange ‘C’ |
Diameter at Weld Bevel |
Dia of Hub ‘E’ |
Length Through Hub | Bore ‘B’ | Dia of R/F R |
Depth of Socket F |
Length of Threading |
||||
|---|---|---|---|---|---|---|---|---|---|---|---|---|---|---|---|---|
| S/O & S/W Y |
W/N Y |
L/J Y |
S/O & S/W B |
L/J B |
||||||||||||
| 1/2” | 15 | 120.6 | 82.5 | 22.2 | 4 | 22.2 | 21.3 | 38.1 | 31.7 | 60.3 | 31.7 | 22.3 | 22.9 | 34.9 | 9.5 | 22.2 |
| 3/4” | 20 | 130.2 | 88.9 | 22.2 | 4 | 25.4 | 26.7 | 44.4 | 34.9 | 69.8 | 34.9 | 27.7 | 28.2 | 42.9 | 11.1 | 25.4 |
| 1” | 25 | 149.2 | 101.6 | 25.4 | 4 | 28.6 | 33.5 | 52.4 | 41.3 | 73.0 | 41.3 | 34.5 | 35.0 | 50.8 | 12.7 | 28.6 |
| 1 ¼” | 32 | 158.7 | 111.1 | 25.4 | 4 | 28.6 | 42.2 | 63.5 | 41.3 | 73.0 | 41.3 | 43.2 | 43.7 | 63.5 | 14.3 | 30.2 |
| 1 ½” | 40 | 177.8 | 123.8 | 28.6 | 4 | 31.8 | 48.3 | 69.8 | 44.4 | 82.5 | 44.4 | 49.5 | 50.0 | 73.0 | 15.9 | 31.7 |
| 2” | 50 | 215.9 | 165.1 | 25.4 | 8 | 38.1 | 60.4 | 104.8 | 57.1 | 101.6 | 57.1 | 62.0 | 62.5 | 92.1 | 17.5 | 38.1 |
| 2 ½” | 65 | 244.5 | 190.5 | 28.6 | 8 | 41.3 | 73.1 | 123.8 | 63.5 | 123.8 | 63.5 | 74.7 | 75.4 | 104.8 | 19.0 | 47.6 |
| 3” | 80 | 266.7 | 203.2 | 31.7 | 8 | 47.6 | 88.9 | 133.3 | 73.0 | 117.5 | 73.0 | 90.7 | 91.4 | 127.0 | – | 50.8 |
| 4” | 100 | 311.1 | 241.3 | 34.9 | 8 | 54.0 | 114.3 | 161.9 | 90.5 | 123.0 | 90.5 | 116.1 | 116.8 | 157.2 | – | 57.1 |
| 5” | 125 | 374.6 | 292.1 | 41.3 | 8 | 73.0 | 141.2 | 196.8 | 104.8 | 155.6 | 104.8 | 143.8 | 144.5 | 185.7 | – | 63.5 |
| 6” | 150 | 393.7 | 317.5 | 38.1 | 12 | 82.6 | 168.4 | 228.6 | 119.1 | 171.4 | 119.1 | 170.7 | 171.4 | 215.9 | – | 69.8 |
| 8” | 200 | 482.6 | 393.7 | 44.4 | 12 | 92.1 | 219.2 | 292.1 | 142.9 | 212.7 | 142.8 | 221.5 | 222.2 | 269.9 | – | 76.2 |
| 10” | 250 | 584.2 | 482.6 | 50.8 | 12 | 107.9 | 273.0 | 368.3 | 158.7 | 254.0 | 177.8 | 276.3 | 277.4 | 323.8 | – | 84.1 |
| 12” | 300 | 673.1 | 571.5 | 54.0 | 16 | 123.8 | 323.8 | 450.8 | 181.0 | 282.5 | 219.1 | 327.1 | 328.2 | 381.0 | – | 92.1 |
| 14” | 350 | 749.5 | 635.0 | 60.5 | 16 | 133.4 | 355.6 | 495.3 | – | 298.5 | 241.3 | 359.1 | 360.2 | 412.7 | – | – |
| 16” | 400 | 825.5 | 704.9 | 66.5 | 16 | 146.1 | 406.4 | 552.5 | – | 311.2 | 260.4 | 410.5 | 411.2 | 469.9 | – | – |
| 18” | 450 | 914.5 | 774.7 | 73.5 | 16 | 162.0 | 457.2 | 596.9 | – | 327.0 | 276.2 | 461.8 | 462.3 | 533.4 | – | – |
| 20” | 500 | 984.0 | 831.9 | 79.5 | 16 | 177.8 | 508.0 | 641.4 | – | 355.6 | 292.1 | 513.1 | 514.3 | 584.2 | – | – |
| 24” | 600 | 1168.5 | 990.6 | 92.0 | 16 | 203.2 | 609.6 | 762.0 | – | 406.4 | 330.2 | 615.9 | 615.9 | 692.1 | – | – |
ANSI/ASME B16.5 Class 2500 Flanges – Dimensions & Sizes in mm
| Nominal Pipe Size |
Flange Dia ‘O’ |
Dia of Bolt Circle ‘A’ |
Dia of Bolt Holes ‘D’ |
No. of Holes |
Thickness of Flange ‘C’ |
Diameter at Weld Bevel |
Dia of Hub ‘E’ |
Length Through Hub | Bore ‘B’ | Dia of R/F R |
Depth of Socket F |
Length of Threading |
||||
|---|---|---|---|---|---|---|---|---|---|---|---|---|---|---|---|---|
| S/O & S/W Y |
W/N Y |
L/J Y |
S/O & S/W B |
L/J B |
||||||||||||
| 1/2” | 15 | 133.3 | 88.9 | 22.2 | 4 | 30.2 | 21.3 | 42.9 | 39.7 | 73.3 | 39.7 | 22.3 | 22.9 | 34.9 | – | 28.6 |
| 3/4” | 20 | 139.7 | 95.2 | 22.2 | 4 | 31.7 | 26.7 | 50.8 | 42.9 | 79.4 | 42.9 | 27.7 | 28.2 | 42.9 | – | 31.7 |
| 1” | 25 | 158.7 | 107.9 | 25.4 | 4 | 34.9 | 33.5 | 57.1 | 47.7 | 88.9 | 47.7 | 34.5 | 35.0 | 50.8 | – | 34.9 |
| 1 ¼” | 32 | 184.1 | 130.2 | 28.6 | 4 | 38.1 | 42.2 | 73.0 | 52.4 | 95.2 | 52.4 | 43.2 | 43.7 | 63.5 | – | 38.1 |
| 1 ½” | 40 | 203.2 | 146.0 | 31.7 | 4 | 44.4 | 48.3 | 79.4 | 60.3 | 111.1 | 60.3 | 49.5 | 50.0 | 73.0 | – | 44.4 |
| 2” | 50 | 234.9 | 171.4 | 28.6 | 8 | 50.8 | 60.4 | 95.2 | 69.8 | 127.0 | 69.8 | 62.0 | 62.5 | 92.1 | – | 50.8 |
| 2 ½” | 65 | 266.7 | 196.8 | 31.7 | 8 | 57.1 | 73.1 | 114.3 | 79.4 | 142.9 | 79.4 | 74.7 | 75.4 | 104.8 | – | 57.1 |
| 3” | 80 | 304.8 | 228.6 | 34.9 | 8 | 66.7 | 88.9 | 133.3 | 92.1 | 168.3 | 92.1 | 90.7 | 91.4 | 127.0 | – | 63.5 |
| 4” | 100 | 355.6 | 273.0 | 41.3 | 8 | 76.2 | 114.3 | 165.1 | 107.9 | 190.5 | 107.9 | 116.1 | 116.8 | 157.2 | – | 69.8 |
| 5” | 125 | 419.1 | 323.8 | 47.6 | 8 | 92.1 | 141.2 | 203.2 | 130.0 | 128.6 | 130.0 | 143.8 | 144.5 | 185.7 | – | 76.2 |
| 6” | 150 | 482.6 | 368.3 | 54.0 | 8 | 107.9 | 168.4 | 234.9 | 152.4 | 273.0 | 152.4 | 170.7 | 171.4 | 215.9 | – | 82.5 |
| 8” | 200 | 552.4 | 438.1 | 54.0 | 12 | 127.0 | 219.2 | 304.8 | 177.8 | 317.5 | 177.8 | 221.5 | 222.2 | 269.9 | – | 95.2 |
| 10” | 250 | 673.1 | 539.7 | 66.7 | 12 | 165.1 | 273.0 | 374.6 | 228.6 | 419.1 | 228.6 | 276.3 | 277.4 | 323.8 | – | 107.9 |
| 12” | 300 | 762.0 | 619.1 | 73.0 | 12 | 184.1 | 323.8 | 441.3 | 254.0 | 463.5 | 254.0 | 327.1 | 328.2 | 381.0 | – | 120.6 |
Piping Flange Weight Chart (lbs) – Pressure Class 150 to 2500
| Pipe Size | 150 # | 300 # | 600 # | 900 # | 1500 # | 2500 # | ||||||||||||
|---|---|---|---|---|---|---|---|---|---|---|---|---|---|---|---|---|---|---|
| WN | SO | BLD | WN | SO | BLD | WN | SO | BLD | WN | SO | BLD | WN | SO | BLD | WN | SO | BLD | |
| 1/2″ | 2 | 1 | 1 | 2 | 1 | 1 | 2 | 2 | 2 | SEE 1500 # WEIGHTS | 5 | 4 | 4 | 7 | 7 | 7 | ||
| 3/4″ | 2 | 2 | 2 | 3 | 3 | 3 | 4 | 3 | 3 | SEE 1500 # WEIGHTS | 6 | 5 | 6 | 8 | 8 | 8 | ||
| 1″ | 3 | 2 | 2 | 4 | 3 | 3 | 4 | 4 | 4 | SEE 1500 # WEIGHTS | 9 | 8 | 8 | 12 | 11 | 11 | ||
| 1 1/2″ | 4 | 3 | 3 | 7 | 6 | 6 | 8 | 7 | 8 | SEE 1500 # WEIGHTS | 13 | 12 | 13 | 25 | 22 | 23 | ||
| 2″ | 6 | 5 | 5 | 9 | 7 | 8 | 12 | 9 | 10 | SEE 1500 # WEIGHTS | 25 | 25 | 25 | 42 | 37 | 39 | ||
| 2 1/2″ | 8 | 7 | 7 | 12 | 10 | 12 | 18 | 13 | 15 | SEE 1500 # WEIGHTS | 36 | 36 | 35 | 52 | 55 | 56 | ||
| 3″ | 10 | 8 | 9 | 15 | 13 | 16 | 23 | 16 | 20 | 31 | 26 | 29 | 48 | 48 | 48 | 94 | 83 | 86 |
| 4″ | 15 | 13 | 17 | 25 | 22 | 27 | 42 | 37 | 41 | 53 | 53 | 54 | 73 | 73 | 73 | 145 | 125 | 130 |
| 5″ | 19 | 15 | 20 | 32 | 28 | 35 | 68 | 63 | 68 | 86 | 83 | 87 | 130 | 130 | 140 | 245 | 210 | 225 |
| 6″ | 24 | 19 | 26 | 42 | 39 | 50 | 81 | 80 | 86 | 110 | 110 | 115 | 165 | 165 | 160 | 380 | 325 | 345 |
| 8″ | 39 | 30 | 45 | 67 | 58 | 81 | 120 | 115 | 140 | 175 | 170 | 200 | 275 | 260 | 300 | 580 | 485 | 530 |
| 10″ | 52 | 43 | 70 | 91 | 81 | 124 | 190 | 170 | 230 | 260 | 245 | 290 | 455 | 435 | 510 | 1075 | 930 | 1025 |
| 12″ | 80 | 64 | 110 | 140 | 115 | 185 | 225 | 200 | 295 | 325 | 325 | 415 | 690 | 580 | 690 | 1525 | 1100 | 1300 |
| 14″ | 110 | 90 | 140 | 180 | 165 | 250 | 280 | 230 | 355 | 400 | 400 | 520 | 940 | NA | 975 | NA | NA | NA |
| 16″ | 140 | 98 | 180 | 250 | 190 | 295 | 390 | 330 | 495 | 495 | 425 | 600 | 1250 | NA | 1300 | NA | NA | NA |
| 18″ | 150 | 130 | 220 | 320 | 250 | 395 | 475 | 400 | 630 | 680 | 600 | 850 | 1625 | NA | 1750 | NA | NA | NA |
| 20″ | 180 | 165 | 285 | 400 | 315 | 505 | 590 | 510 | 810 | 830 | 730 | 1075 | 2050 | NA | 2225 | NA | NA | NA |
| 22″ | 225 | 185 | 355 | 465 | 370 | 640 | 720 | 590 | 1000 | NA | NA | NA | NA | NA | NA | NA | NA | NA |
| 24″ | 260 | 220 | 430 | 580 | 475 | 790 | 830 | 730 | 1250 | 1500 | 1400 | 2025 | 3325 | NA | 3625 | NA | NA | NA |
Flange Tolerances as per ANSI / ASME B16.5, 16.47
| Parameter | Size Range | Tolerance |
|---|---|---|
| Outside Diameter (O.D.) | ≤ 600 mm | +1.6 / – |
| > 600 mm | +3.1 / – | |
| Inside Diameter (Bore) – Welding Neck | ≤ 250 mm | +0.7 / – |
| 12–450 mm | +1.6 / – | |
| ≥ 500 mm | +3.1 / –1.6 | |
| Raised Face Height | 1.6 mm | +0.4 / – |
| 6.3 mm (Tongue & Groove, Male & Female) | +0.4 / – | |
| Diameter of Hub at Weld Point | ≤ 125 mm | +2.2 / –0.7 |
| ≥ 150 mm | +4.0 / –0.7 | |
| Flange Thickness | ≤ 450 mm | +3.1 / –0.0 |
| ≥ 500 mm | +4.7 / –0.0 | |
| Length Through Hub | ≤ 250 mm | +1.6 / – |
| ≥ 300 mm | +3.1 / – | |
| Bolt Circle Diameter | ≤ 600 mm | +0.7 / – |
| ≥ 600 mm | +1.6 / – | |
| Bolt Hole Spacing (Drilling) | – | +0.7 / – |
| Eccentricity w.r.t. Bore | – | 0.70 max |
| Inside Diameter – Threaded, Slip-On, Lap Joint, Socket Weld & Blind Flanges |
≤ 250 mm | +0.7 / –0.0 |
| ≥ 300 mm | +1.6 / –0.0 | |
| Threaded Counter Bore Diameter | ≤ 250 mm | +0.7 / –0.0 |
| ≥ 300 mm | +1.6 / –0.0 | |
| Outside Diameter of Hub | ≤ 300 mm | +2.3 / –1.6 |
| ≥ 350 mm | +3.1 / – | |
| Length Through Hub – Threaded/Slip-On Lap Joint/Socket Weld/Blind |
≤ 450 mm | +3.0 / –1.6 |
| ≥ 500 mm | +4.8 / –1.6 |
What are the key factors to consider when selecting a piping flange?
When choosing a flange, engineers must evaluate multiple parameters beyond size and material:
- Pressure Class – Ensure the flange can withstand the design pressure at the specified operating temperature (ASME classes: 150, 300, 600, 900, 1500, 2500).
- Temperature Rating – Flange materials lose strength at high temperatures; check ASME B16.5 or B16.47 temperature-pressure charts.
- Material Compatibility – Select material (CS, SS, Alloy, Duplex, etc.) based on fluid type (corrosive, cryogenic, high-temp, sour service).
- Facing Type – Choose RF (Raised Face), FF (Flat Face), RTJ (Ring Type Joint), or Tongue & Groove depending on sealing requirements.
- Connection Type – Welding neck, slip-on, socket weld, threaded, or lap joint based on ease of installation and strength needs.
- Industry Standards – Verify compliance with ASME, API, AWWA, EN 1092-1, BS, DIN, or GOST depending on project specification.
What is the difference between Raised Face (RF) and Ring Type Joint (RTJ) flanges?
-
Raised Face (RF):
- Common in petrochemical and water treatment plants.
- Uses flat/spiral wound gaskets.
- Economical and widely available.
- Not suitable for extremely high pressure.
-
Ring Type Joint (RTJ):
- Designed for high-pressure (Class 600+) and high-temperature services.
- Uses a metallic ring gasket seated in a precision-machined groove.
- Provides metal-to-metal sealing, ideal for oil & gas, refineries, subsea pipelines.
- Prevents gasket blowout under fluctuating pressure.
What are the common failure modes of flanges and how can they be prevented?
-
Gasket Leakage: Caused by poor surface finish, incorrect torque, or gasket mismatch.
- Prevention → Follow ASME PCC-1 bolting guidelines, use proper torque sequence.
-
Bolt Failure: Due to over-tightening, fatigue, or corrosion.
- Prevention → Use coated/grade-specified bolts, controlled tightening.
-
Corrosion (Crevice / Pitting): Happens in flange faces or bolt holes.
- Prevention → Material upgrade (Duplex, Inconel), apply anti-corrosion coating.
-
Misalignment Stress: Caused during installation.
- Prevention → Ensure proper alignment with pipe spool tolerances.
-
Thermal Expansion Cracking: In high-temp services.
- Prevention → Allow for expansion joints and flexible couplings.

